


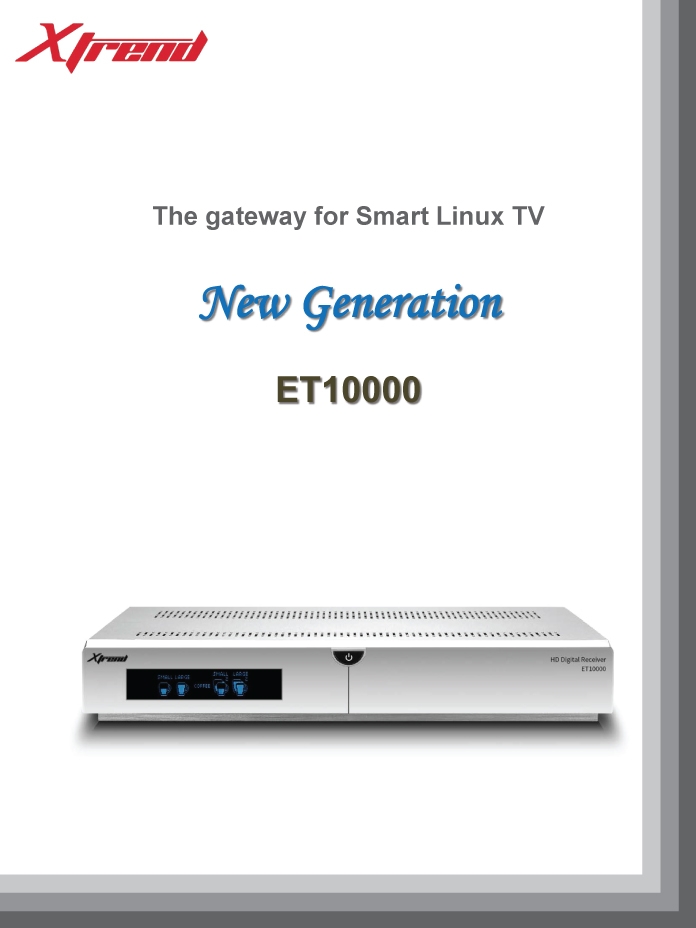
ET-10000 Official Leaflet!
Both Xtrend forums just release new info about this highly anticipated piece of hardware. By the looks of it, I can easily say this box will beat any other box on the market, even Duo 2! Main features are:
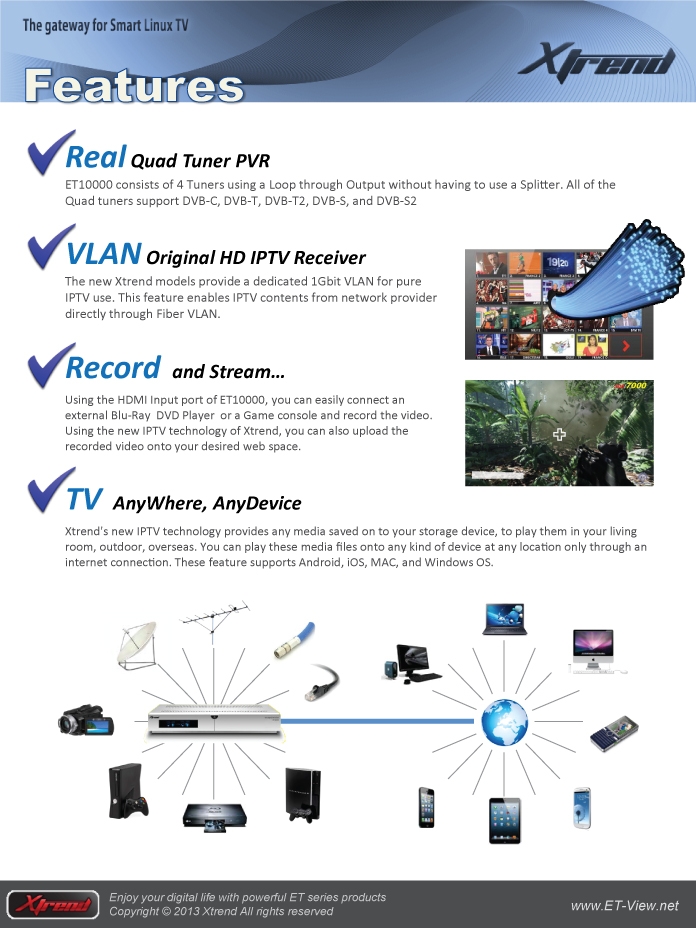
4 Tuners
ET10000 consists of 4 Tuners using a Loop through Output without having to use a Splitter. All of the Quad tuners support DVB-C, DVB-T, DVB-T2, DVB-S, and DVB-S2
IPTV Support
The new Xtrend models provide a dedicated 1Gbit VLAN for pure IPTV use. This feature enables IPTV contents from network provider directly through Fiber VLAN.
Record and Stream
Using the HDMI Input port of ET10000, you can easily connect an external Blu-Ray DVD Player or a Game console and record the video. Using the new IPTV technology of Xtrend, you can also upload the recorded video onto your desired web space.
Leaflet Pictures (Source: http://www.et-view-support.com)
![]()

Searching for new writers!
My blog has been helping people for over 9 months now but I would also like to help those who cannot understand English. Therefore I am searching for writers in these languages: German, French, Serbian, Dutch
If you decide to join me, I will created new account for you so you will be able to post your articles. In return you will be able to include advertisiments to your articles, but only if they are related to satellite industry. Please send email to support”at”satnigmo.com!
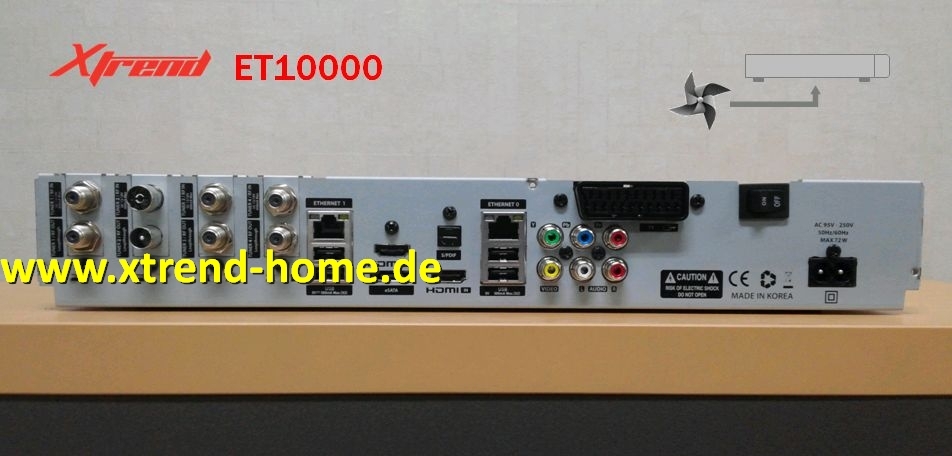
Xtread ET-10000 revealed!
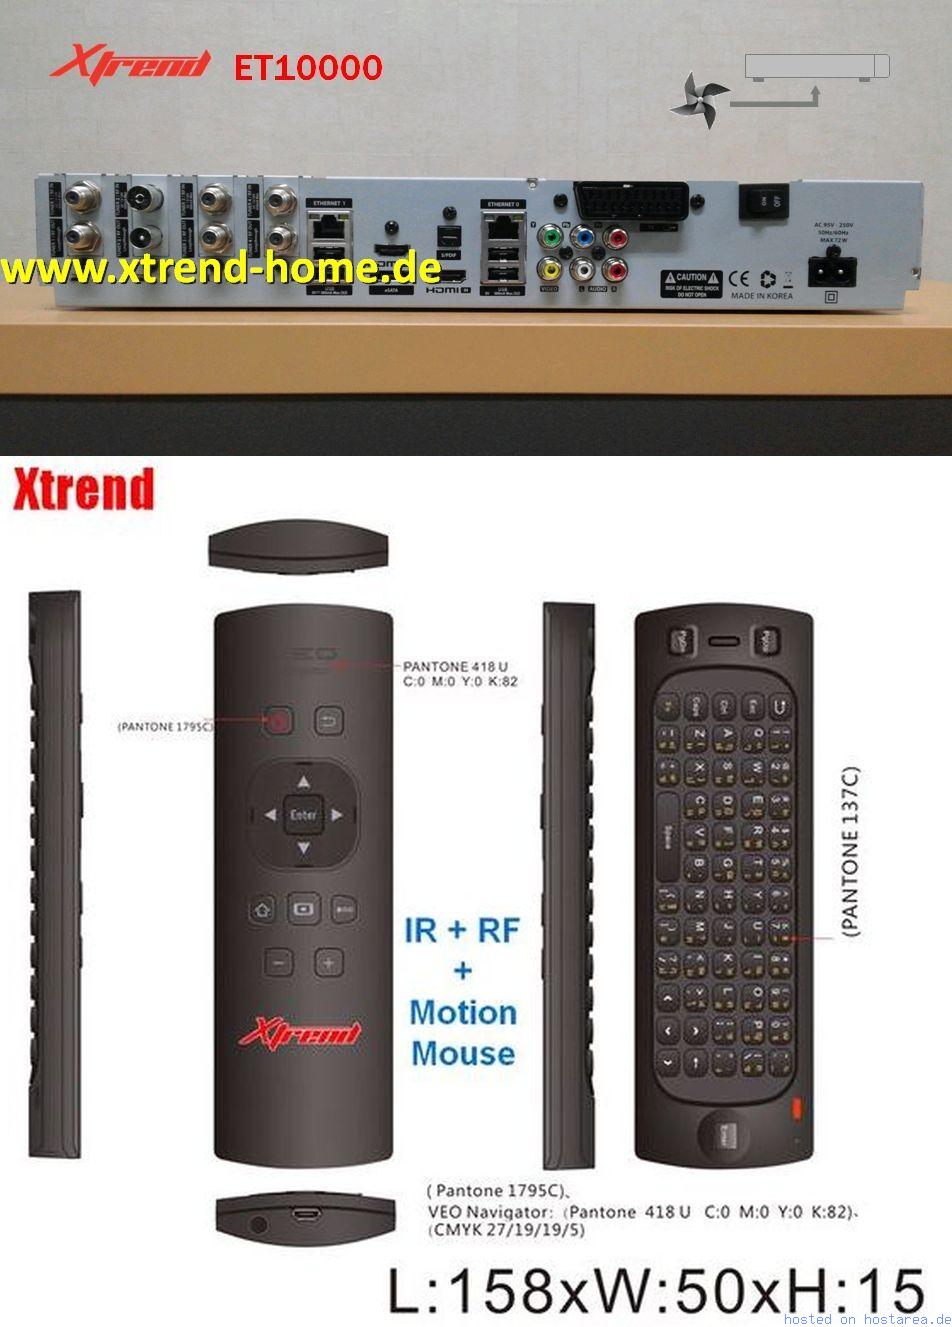
Xtrend-home.de forum just revealed information about new Xtrend ET-10000 model. More information will be published in following days and weeks. Receiver is based on next generation chipset which is the same as in Vu+ Duo2. If you compare Vu+ Duo2 and ET-10000, you can notice four main differences: 4x rear USB ports, 4 tuner slots (2 of them can be P&P), HDMI in port and two LAN ports. Extra -USB ports and tuner slots seem to be a nice feature. I am not sure about usefulness of HDMI in and two LAN ports. Does Enigma 2 even support two LAN at the same time? I am not sure.
This could become the best receiver on the market with good support. OpenPLi should be supported instantly as Xtrend is using OpenPLi images as their “original” or “shipping” image. With Vu+ this is not the case and OpenPLi still doesnt support Duo 2.
SPECIFICATIONS and IMAGES
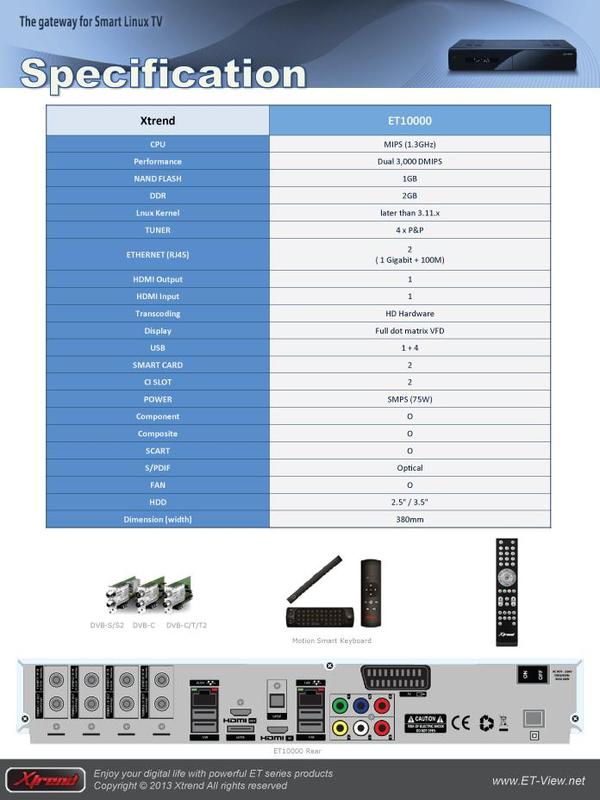
BCM 7424, 1.3 Ghz
NAND Flash: 1 GB
DDR RAM: 2 GB
1x USB (front)
Smartcard: 2x
CI Slot: 2x
RCA AV: YPbPr, CVBS, Audio (R/L)
SPDIF: 1x Optical
Tuner: 2x Plug and Play + 2x Plug and Play (option)
ESATA: 1x
USB: 4x (rear)
Ethernet: yes
Fix for High Bitrate CI Modules and Vu+ Receivers
Vu+ Solo 2 (and probably Duo 2 but not tested yet) has problems with high bitrate CI and CI+ modules. These modules are used by some providers like D-Smart in Turkey and MAX TV in Croatia. Vu+ was informed about this problem but they havent responded yet. Typical Vu+ behavior 😉
Luckily there is one user who managed to fix this problem which is not that big if one user can fix it without access to drivers! Fix can be obtained here: http://buyukbang.blogspot.com/2013/05/vu-solo2-ci-high-bitrate-fix.html
Fix was primarily made for OpenPLi 3.0 but now it also works with older OpenPLi 1.6. You might try it with other non-PLi based images like BlackHole and VTi but I am not sure if this will work there. Fix 100% fixes high bitrate support for D-Smart and MAX TV CI modules.
If you know about other modules, please let me know and I will add it to the list.
Repair guide for Vu+ Duo red light problem
Even though I do not use my Duo anymore, I decided to replace infamous C807 capacitor with the new one. Capacitor is known to fail after 2 or more years of everyday operation. What happens if capacitor fails? When the receiver is switched on, it does not boot into Enigma. Instead you get permanent red light with black VFD screen.
What do you need?
1. Tool for soldering and soldering iron. Here is my basic kit:
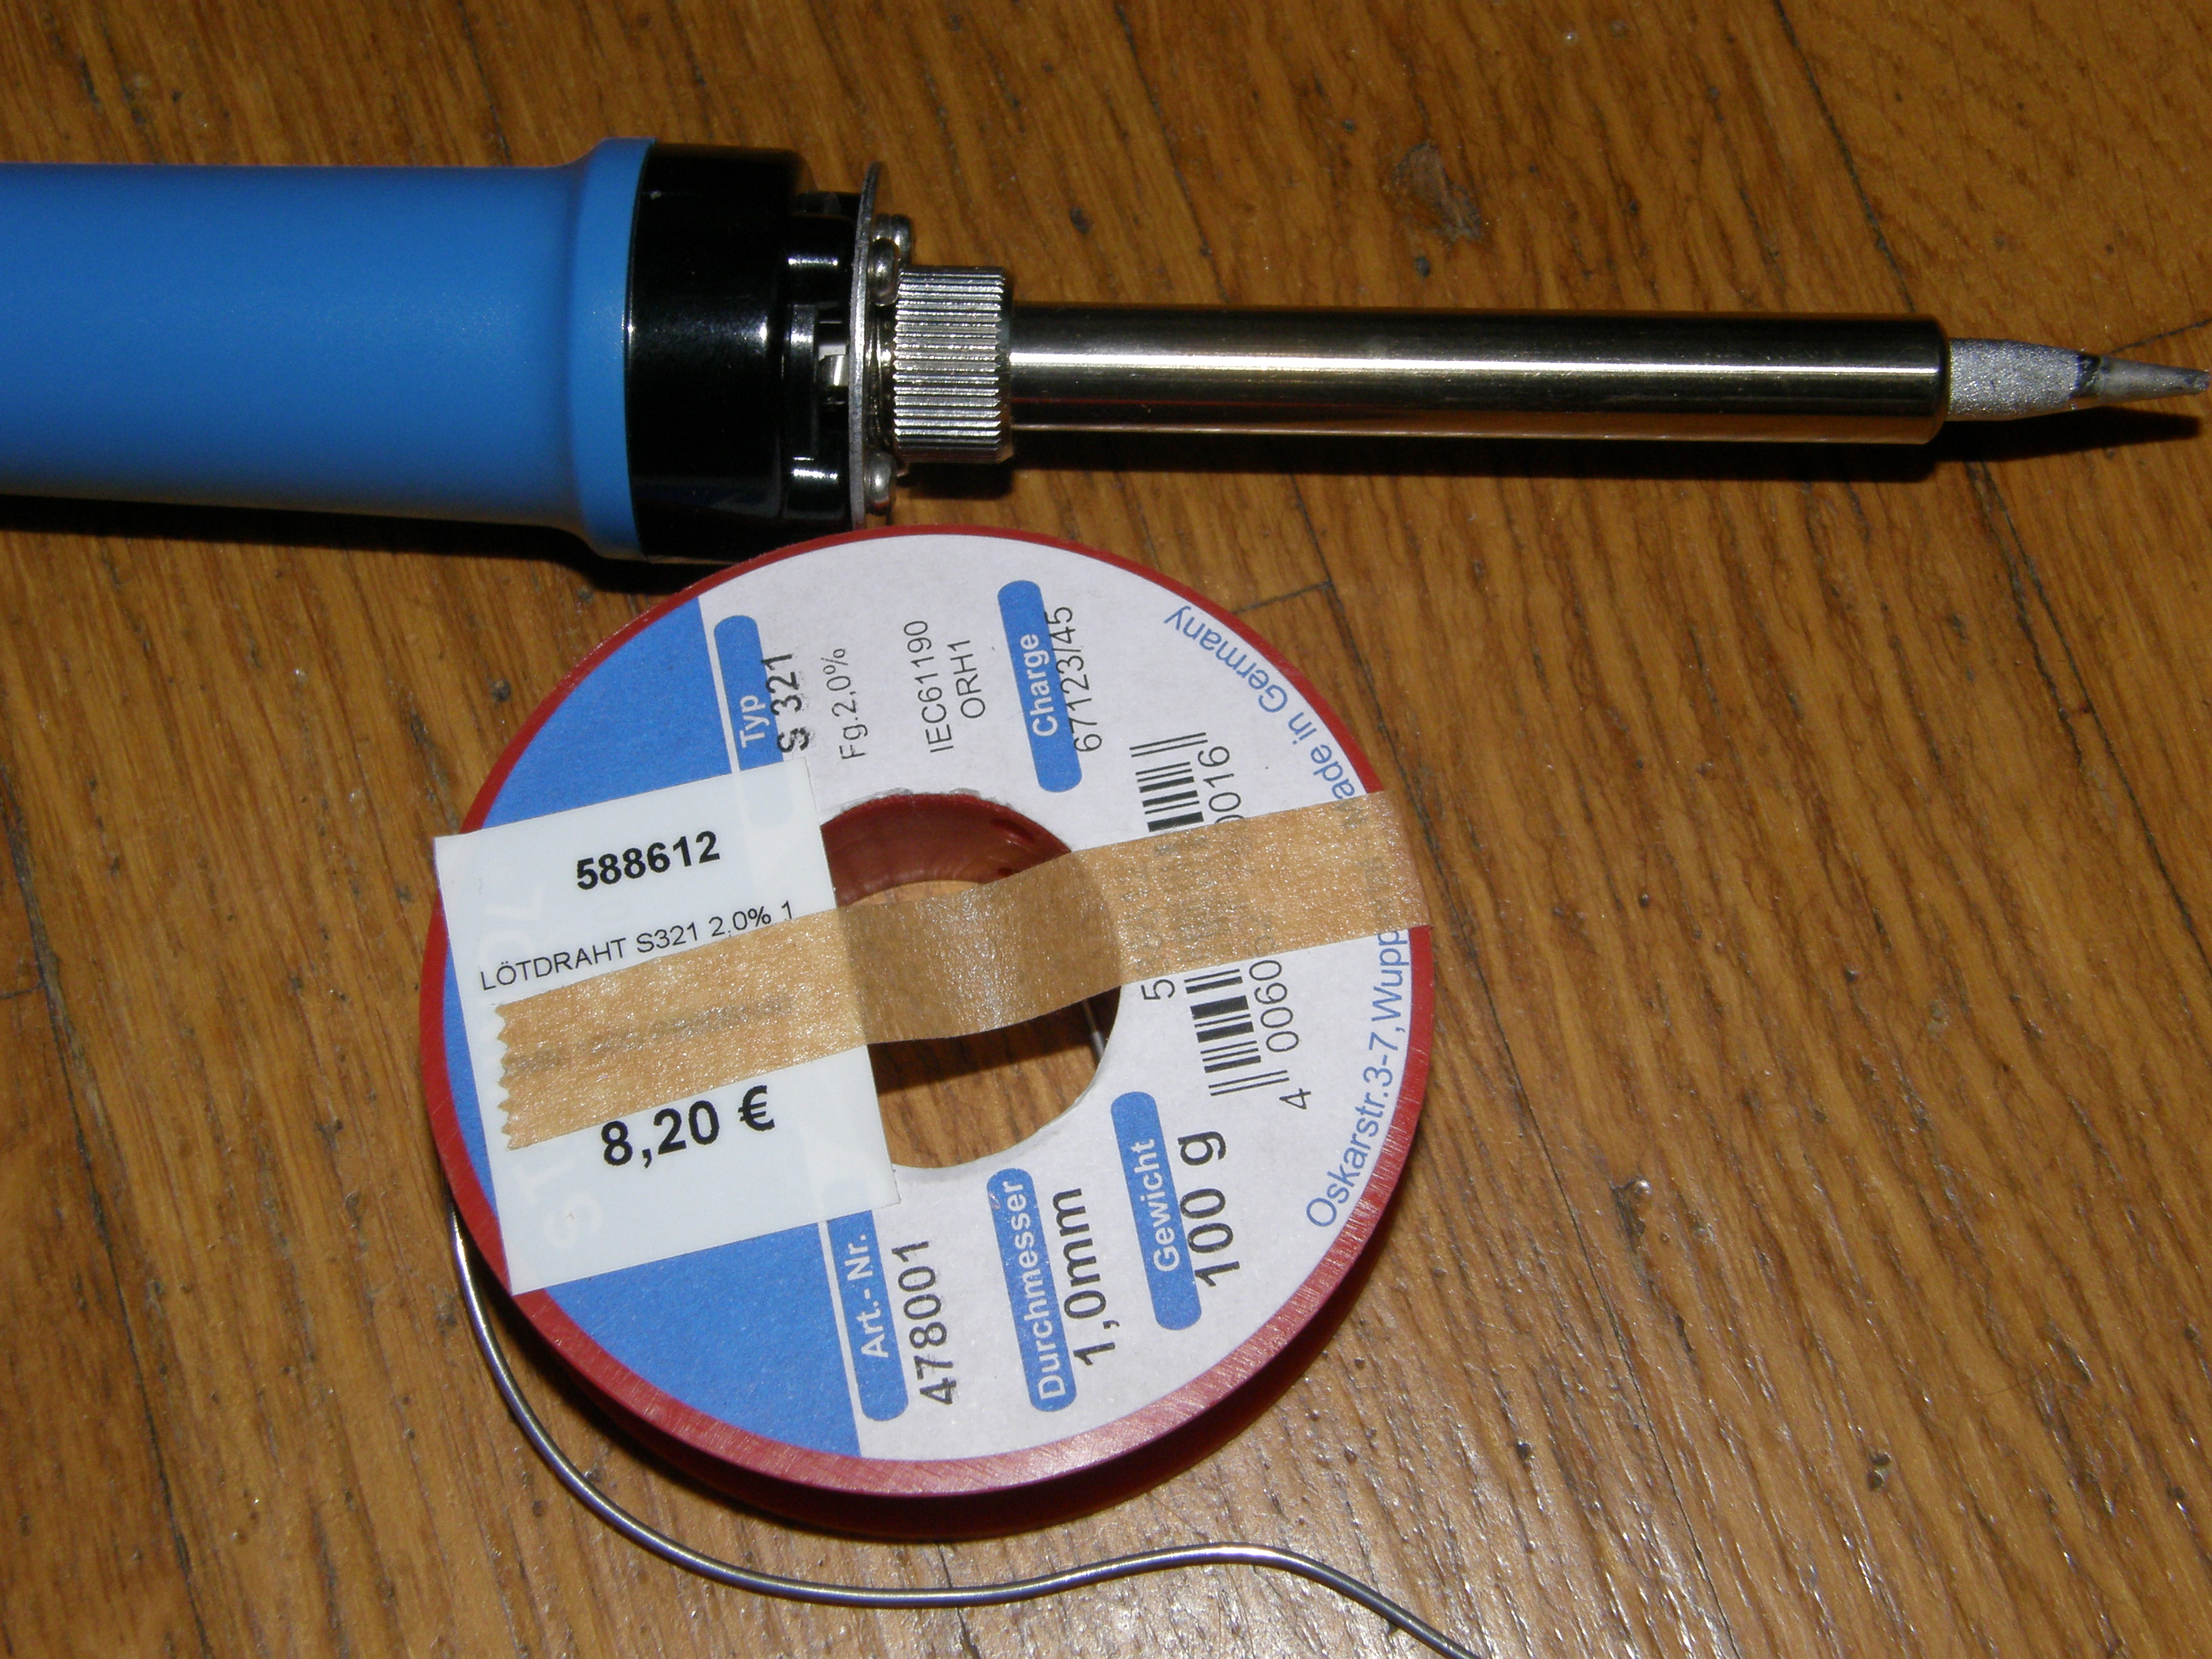
2. Electrical pliers for removal of old capacitor.
3. New capacitor. I bought this one on ebay: 330uf 25v 105c Panasonic FC Low
Process explanation
1. First you need to cut away old capacitor. Be careful not to cut to much as you will solder new capacitor on leftover pins from old capacitor.
2. Prepare your sholdering tool. When ready, apply soldering iron on the tip of the tool.
3. Grab new capacitor and put it on the base of the old capacitor. Make sure that the negative polarity in connected to the white part of the old capacitor base. Negative polarity on capacitor is labeled with “-” signs. Put some soldering iron on the pins of new capacitor and you should be done. Please check pictures below if you are not sure.
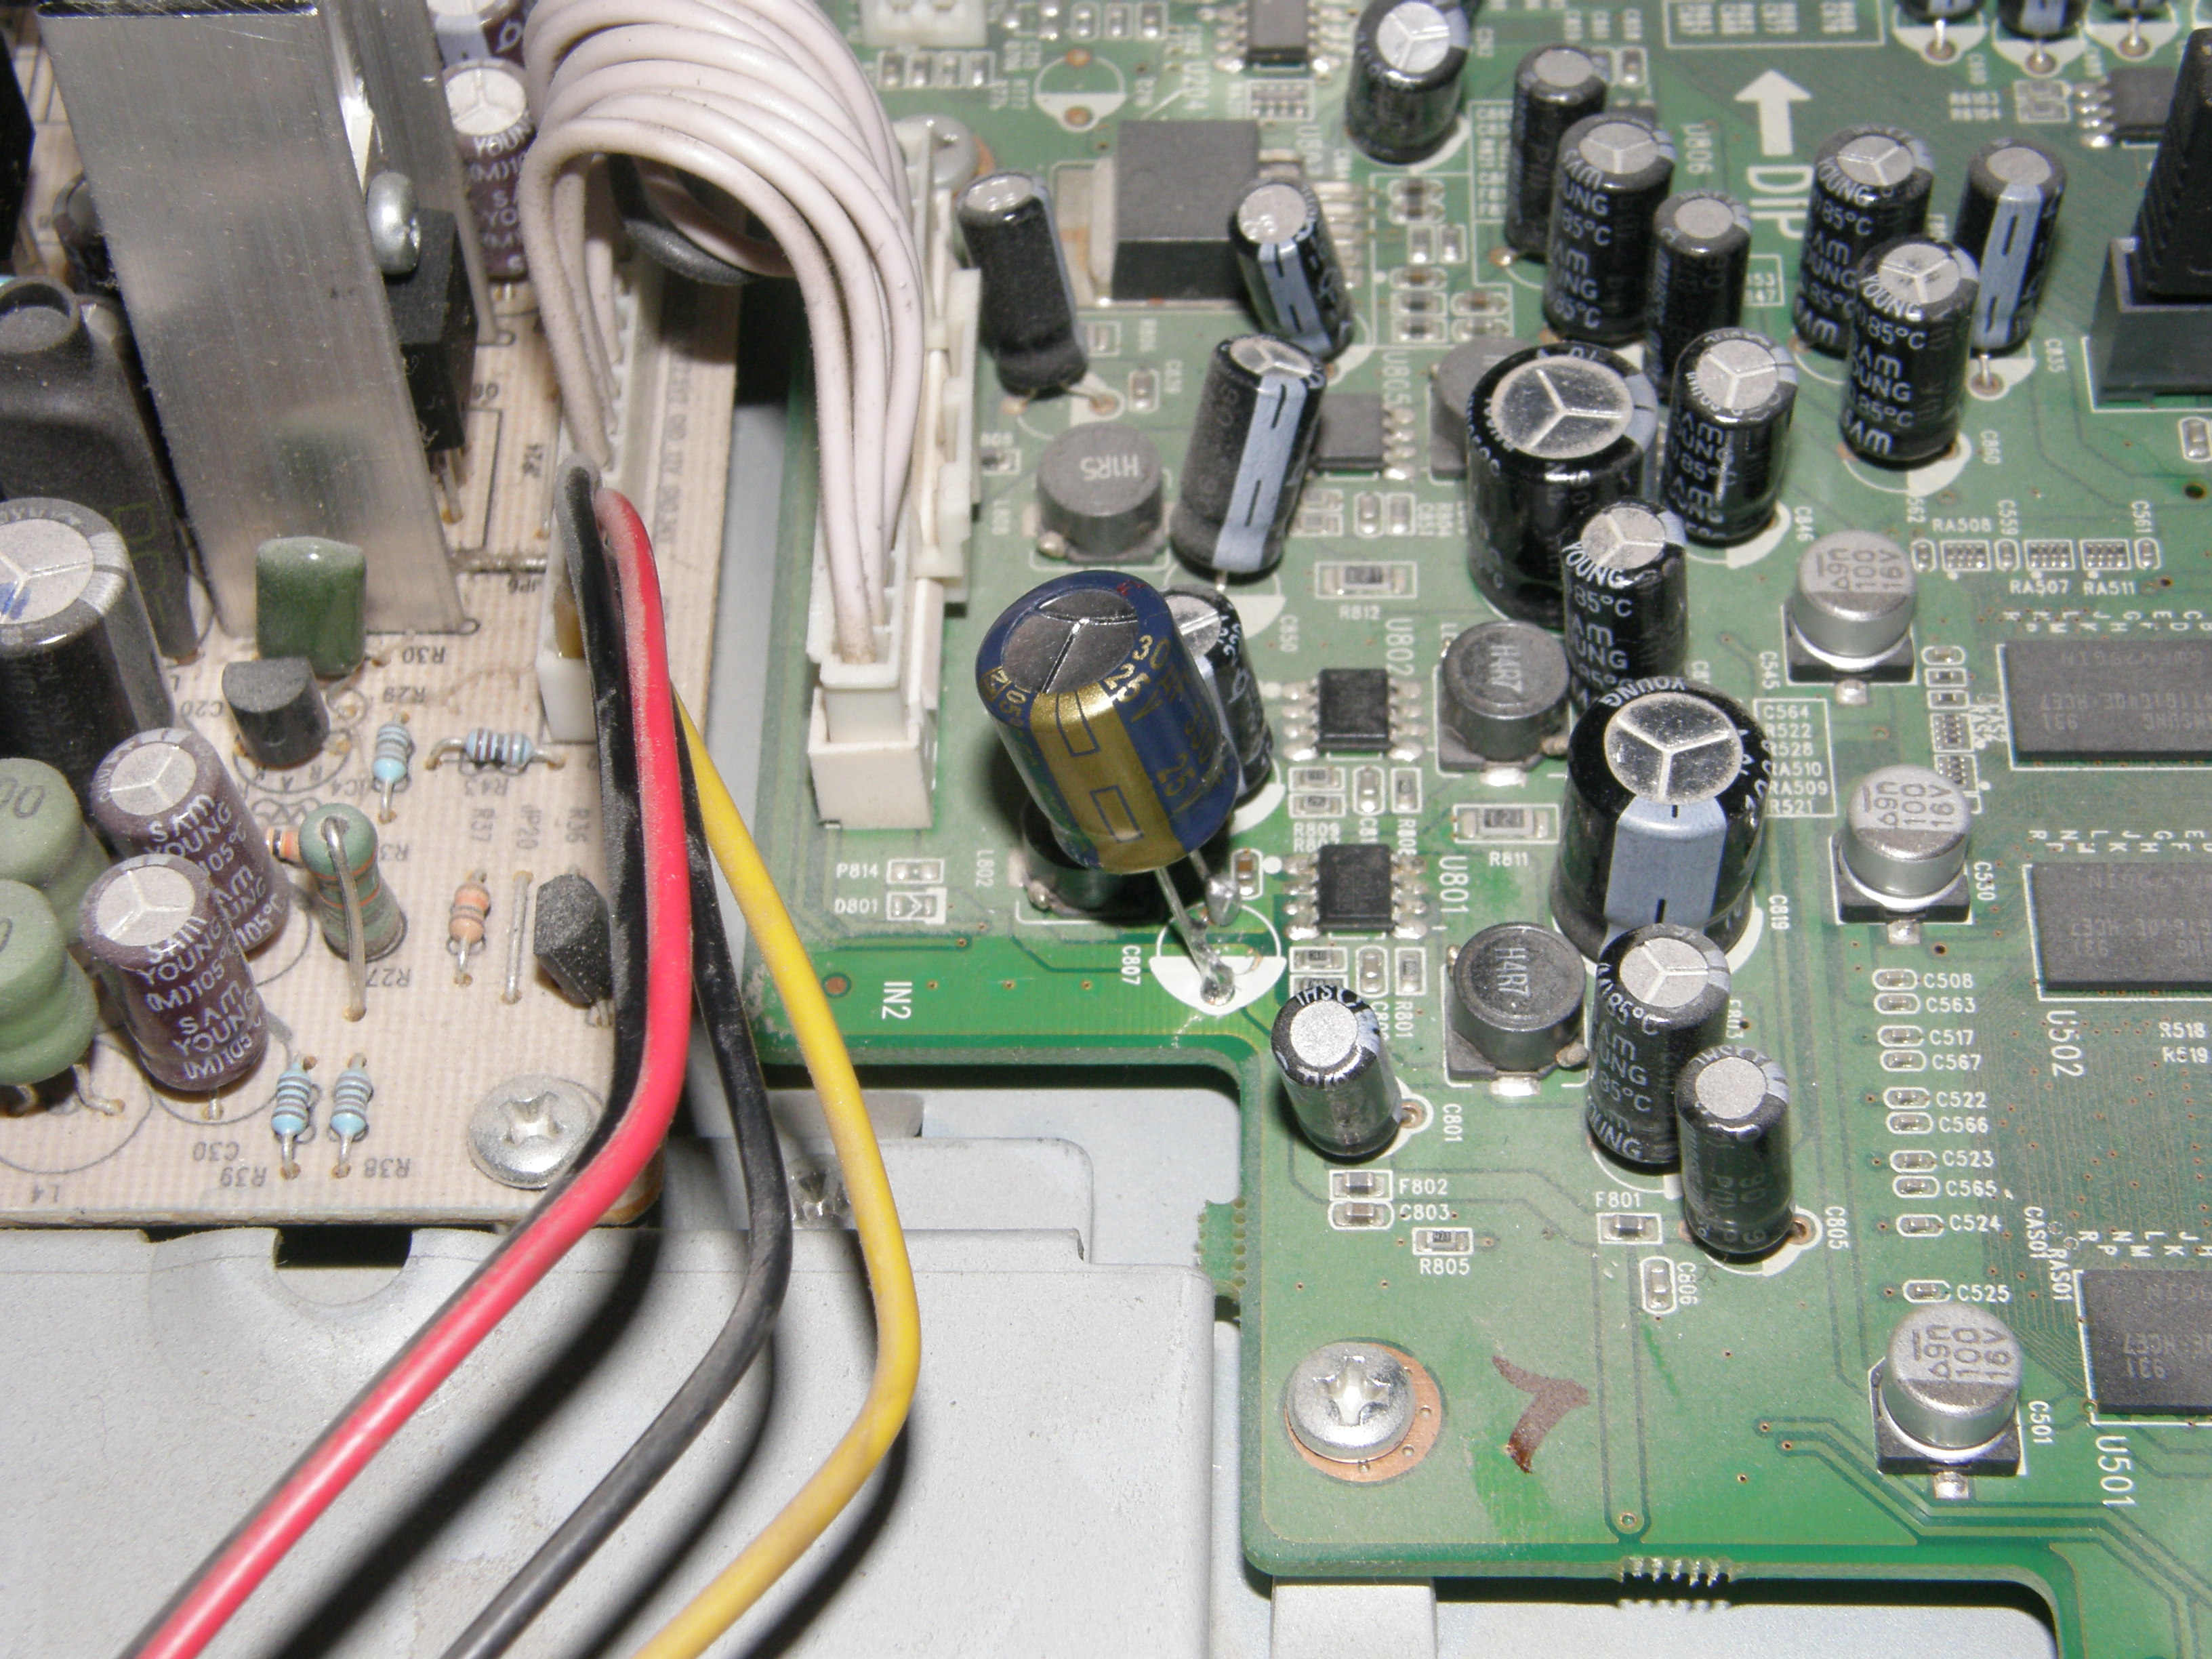
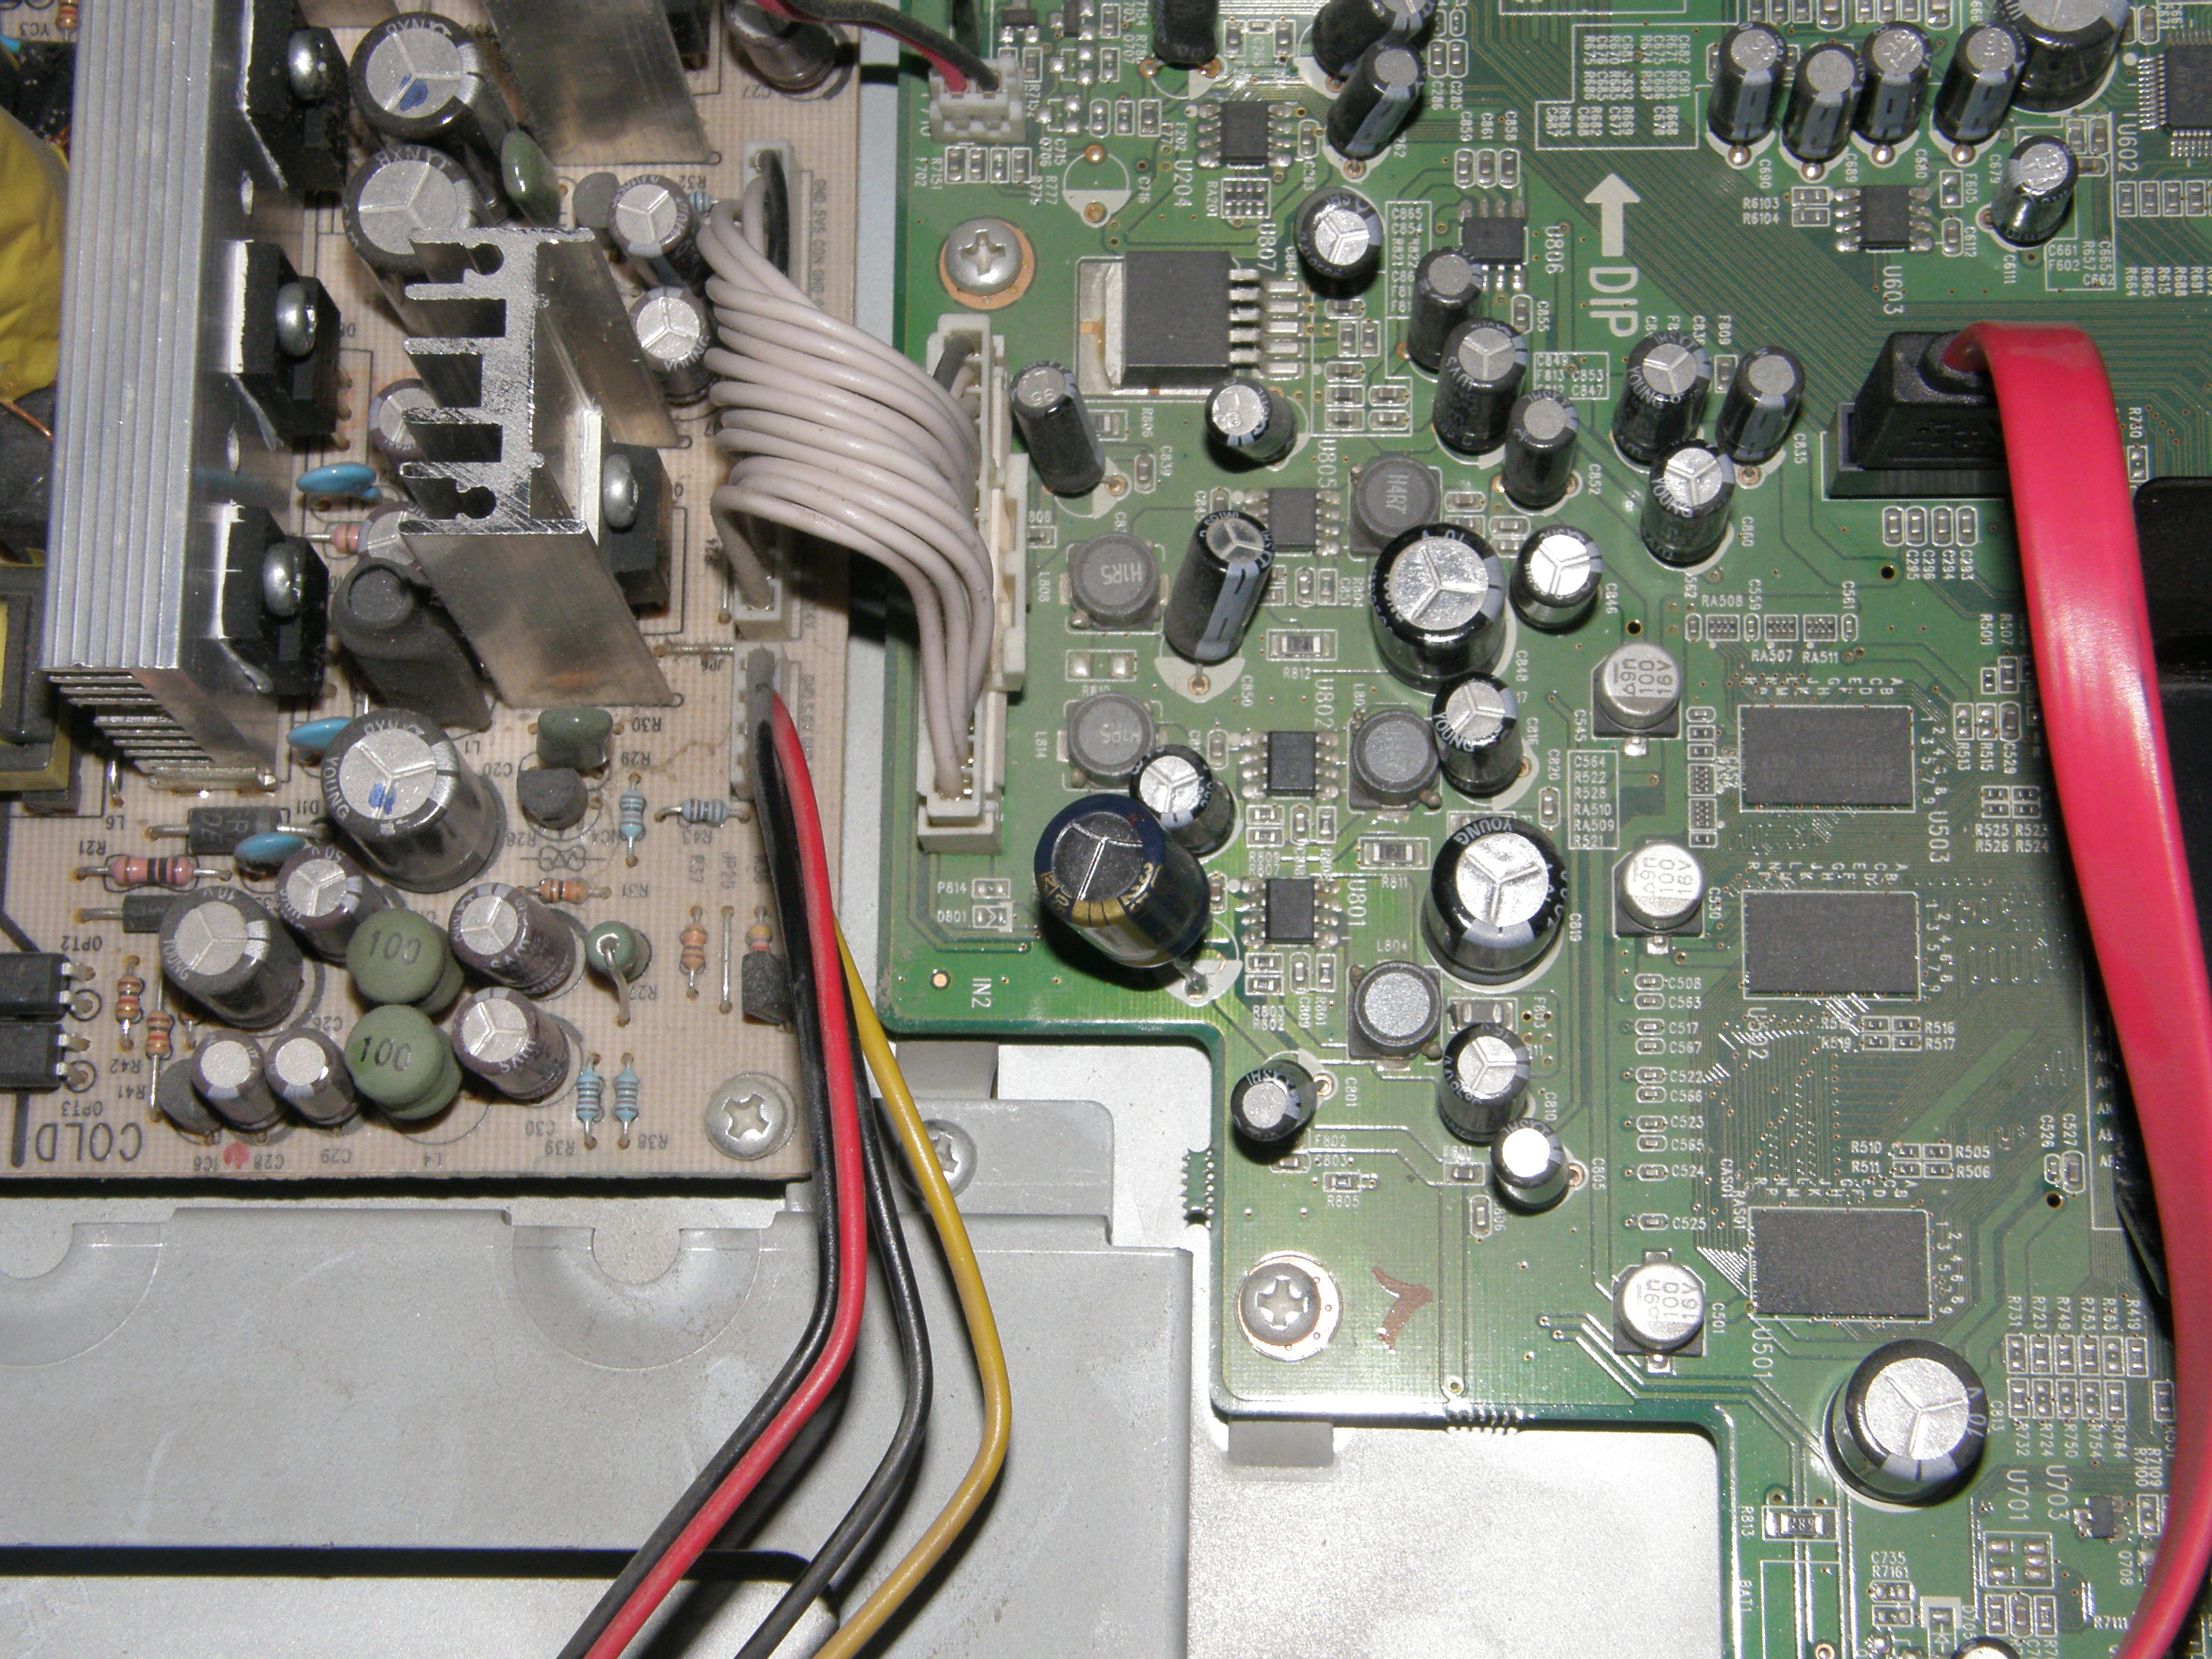
4. Power on the receiver and hope that it will boot without any problems. It is recommended to replace old capacitor before red light appears. If you do not, you can risk failure of not only capacitor but also nearby transistors. In such case new capacitor does not help.
For discussion please visit this thread:
