


CCcam Debugging Information
I just stumbled upon this great tutorial where there are listed probably all CCcam errors and possible solutions for them. For this tutorial to be useful you need change/add one line in CCcam.cfg and start CCcam with special command. Here is how you need to do it:
1. Run CCcam from telnet with this command:/var/bin/CCcam -d >>/var/log/debug &
2. If you have a linux server like Ubuntu, you can add this line into CCcam.cfg: DEBUG: yes
All debugging data is then automatically stored here and without the need to use upper command: /var/log/debug
Access to tutorial: http://www.sat-dreambox.com/f643/cccam-debugging-8463/
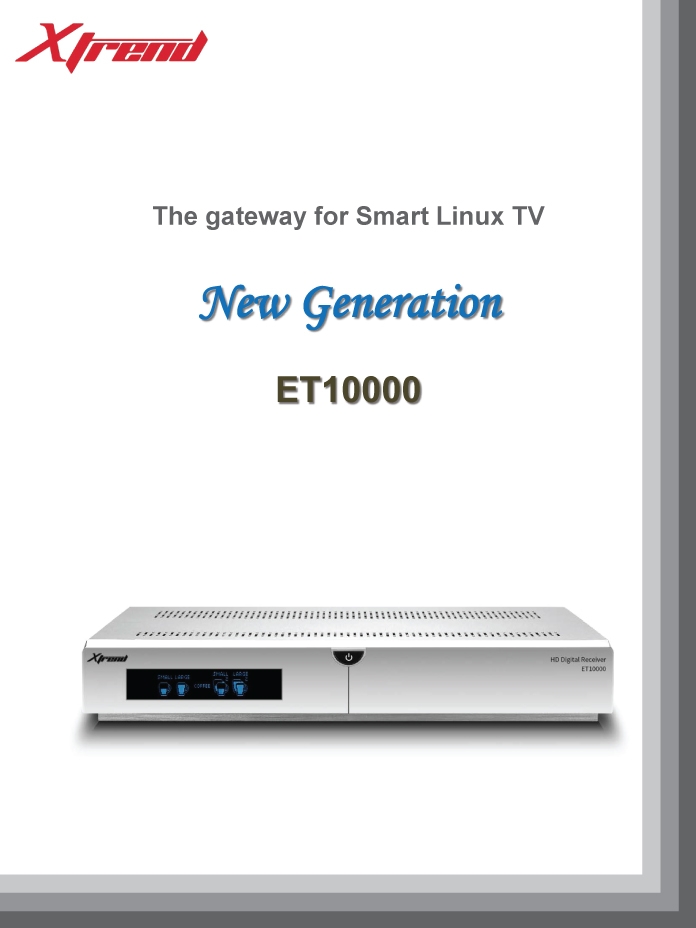
ET-10000 Official Leaflet!
Both Xtrend forums just release new info about this highly anticipated piece of hardware. By the looks of it, I can easily say this box will beat any other box on the market, even Duo 2! Main features are:
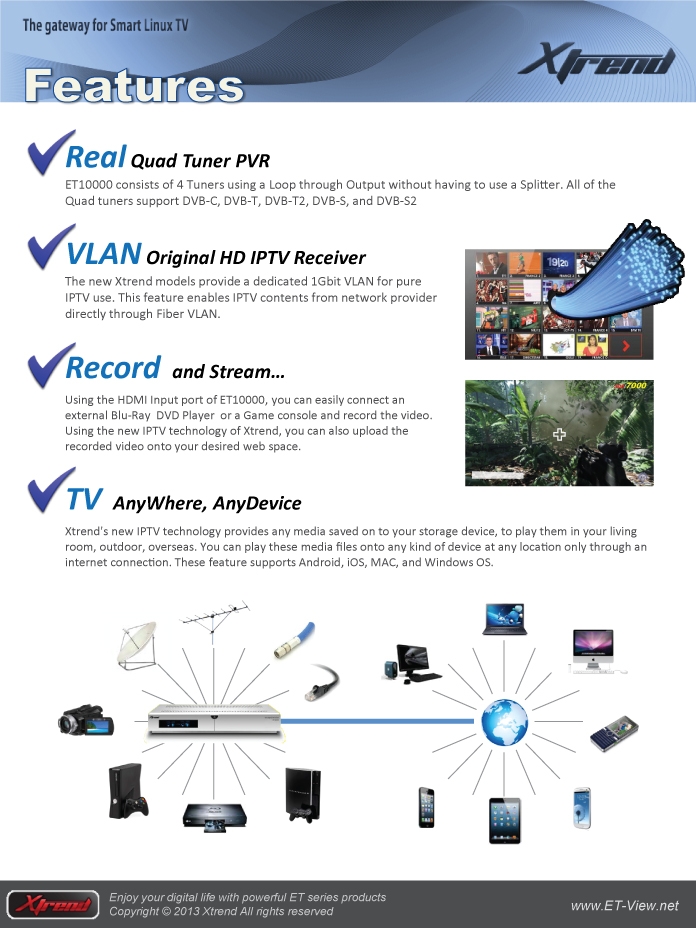
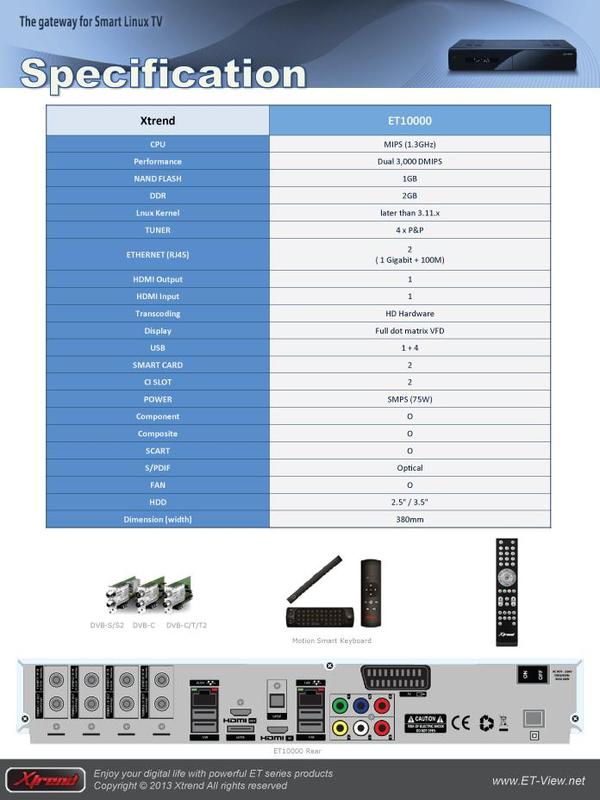
4 Tuners
ET10000 consists of 4 Tuners using a Loop through Output without having to use a Splitter. All of the Quad tuners support DVB-C, DVB-T, DVB-T2, DVB-S, and DVB-S2
IPTV Support
The new Xtrend models provide a dedicated 1Gbit VLAN for pure IPTV use. This feature enables IPTV contents from network provider directly through Fiber VLAN.
Record and Stream
Using the HDMI Input port of ET10000, you can easily connect an external Blu-Ray DVD Player or a Game console and record the video. Using the new IPTV technology of Xtrend, you can also upload the recorded video onto your desired web space.
Leaflet Pictures (Source: http://www.et-view-support.com)
![]()

How to properly install omnikey readers on Ubuntu
I use omnikey readers with OScam and I had many problems with readers detection especially after cold boot or after reboot of my ubuntu 12.04 32bit server. Therefore I decided that it is finally time to do some research and try to fix annoying detection problem in OScam. You need to do the following:
1. Use WinSCP and connect to your receiver using SCP connection. Search for /etc/opensc/opensc.conf file and replace it with this one here: https://www.satnigmo.com/opensc.rar
Then you need to double click on it and file should open in WinSCP internal file editor or in external one, it depends on WinSCP settings. Search for “provider_library = /lib/libpcsclite.so.1” line and replace it with “provider_library = /lib/i386-linux-gnu/libpcsclite.so.1” if you have 32bit Ubuntu or replace it with “provider_library = /lib/x86_64-linux-gnu-linux-gnu/libpcsclite.so.1” if you have 64bit Ubuntu. After succesful editing save the file and go to the next step.
2. Search for /etc/init.d/pcscd and double click on it. Then you need to search for these lines:
# if you need to pass arguments to pcscd you should edit the file
# /etc/default/pcscd and add a line
# DAEMON_ARGS=”–your-option”
Please change these lines to:
# if you need to pass arguments to pcscd edit to:
# /etc/default/pcscd and add a line
DAEMON_ARGS=”–e”
This will prevent never ending logging to /var/log/messages file!
This should be it. After these steps your omnikeys should work without any problems. Do not forget to execute these commands before doing anything: “apt-get update&apt-get upgrade”. If you dont know how to install omnikey drivers, just execute these commands and readers should start working: “apt-get install opensc pcscd libccid pcsc-tools”
How to autostart udpxy on Enigma 2?
IPTV is becoming increasingly popular among users of Enigma 2 satellite receivers. If you want to watch IPTV channels (mpeg-ts streams) on your receiver then you need udpxy which converts udp/rtp multicast mpeg-ts to unicast http mpeg-ts. For more information about IPTV check out my other article: https://www.satnigmo.com/896/iptv-on-dreambox-vu-xtrend-and-clarke-tech-receivers/
In order to get udpxy to start after boot, you need to follow this procedure (I tested it on OpenPLi):
1. Download udpxy for MIPS based receivers – CLICK! (BUILD 19, do not use udpxy that you can download from OpenPLi server – build 23)
2. Put udpxy file to /usr/bin folder on your receiver. Use FTP for this. Put 0755 permissions to this file!
3. Download udpxy start script – CLICK!
4. Put start script to /etc/init.d folder on your receiver. Use FTP for this. Put 0755 permissions to this file!
5. Now connect to your receiver using telnet (I suggest DCC for E2) and execute this command:
ln -s /etc/init.d/udpxy /etc/rc3.d/S99udpxy
6. Restart your receiver. After restart udpxy should automatically start. If you want to change port on which udpxy works, just change this line in start script:
start-stop-daemon -S -b -n udpxy -a /usr/bin/udpxy -- -p 8088
As you can see default port is 8088. My recommendation is that you change this port to something which is not 8088 or 1234 as these ports are too common.
FOR DISCUSSION ABOUT THIS ARTICLE VISIT THIS THREAD ON FORUM:
https://www.satnigmo.com/forum/index.php?threads/autostart-udpxy-on-enigma-2-receiver.530/
RELATED ARTICLES:
1. https://www.satnigmo.com/2681/put-iptv-channels-enigma-2-bouquets/
2. https://www.satnigmo.com/2302/converter-for-enigma-2-iptv-channels/
3. https://www.satnigmo.com/896/iptv-on-dreambox-vu-xtrend-and-clarke-tech-receivers/
4. https://www.satnigmo.com/2716/attach-epg-iptv-channels-openpli/
Searching for new writers!
My blog has been helping people for over 9 months now but I would also like to help those who cannot understand English. Therefore I am searching for writers in these languages: German, French, Serbian, Dutch
If you decide to join me, I will created new account for you so you will be able to post your articles. In return you will be able to include advertisiments to your articles, but only if they are related to satellite industry. Please send email to support”at”satnigmo.com!
